March 31, 2015

Little Blue House Product Review

Today I would like to share with you how I made this flower using Doodlebugs Sprinkles Vellum from The Little Blue House.  I love using vellum on layouts and cards and the little texture dots on these vellum sheets make this vellum even more fun to use.


Supplies Needed:

Doodlebug Sprinkles Vellum
Wet Adhesive
Scissors
Brad
Sewing Machine
Thread
                                                                                                                                                               

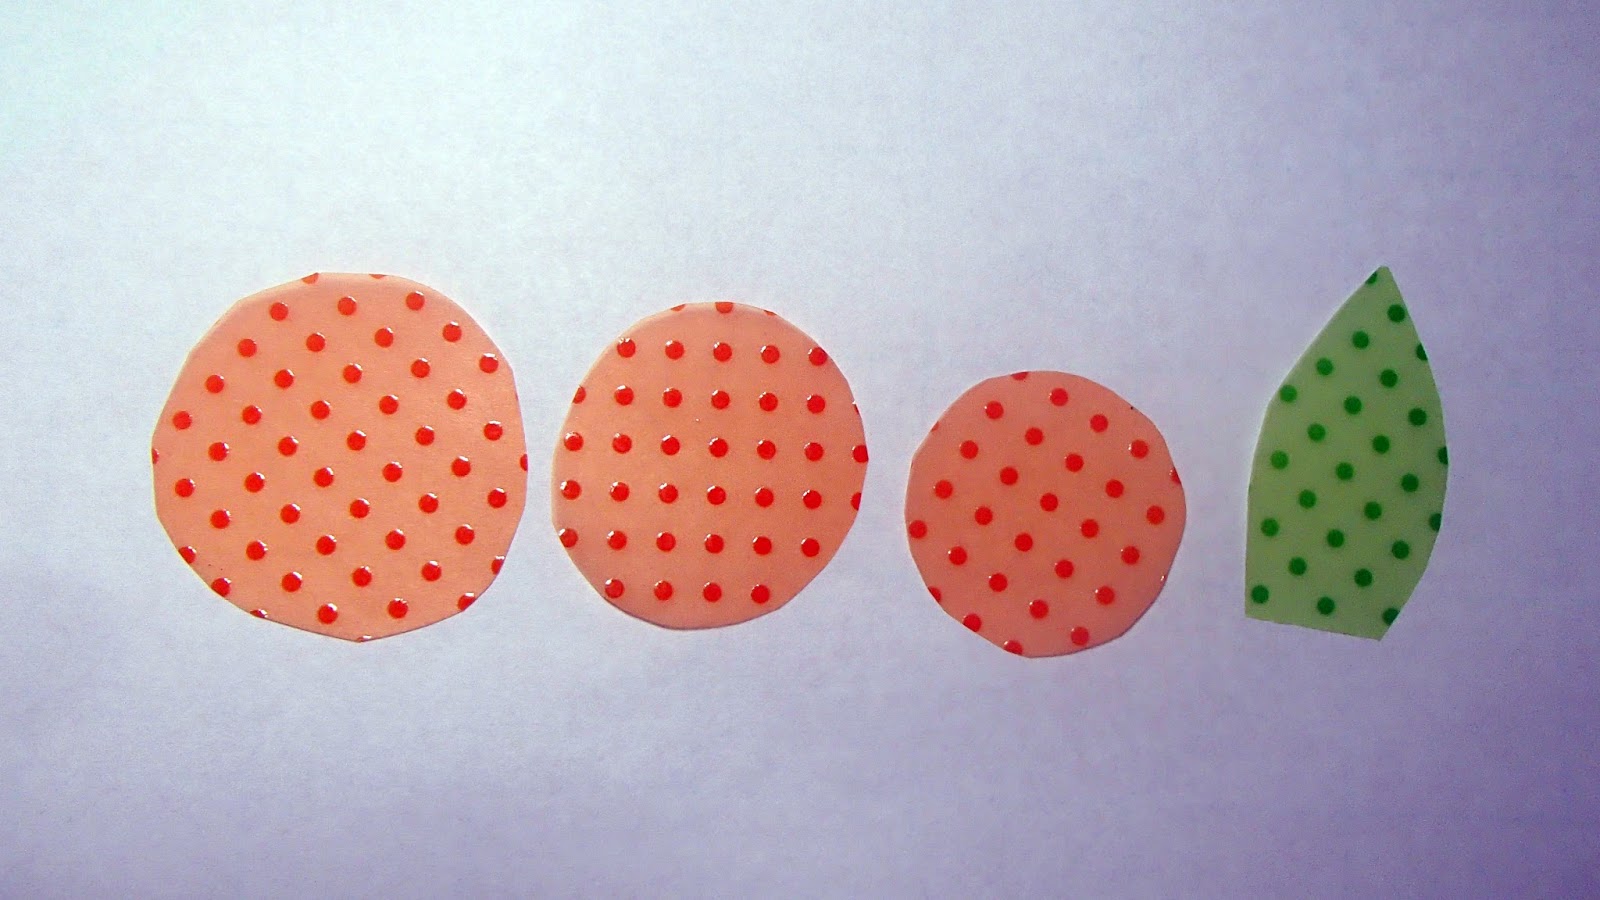
1. Freehand cut three circles with the vellum color of your choice; I used the Tangerine color. Cut each circle slightly larger than the last one. Freehand cut a leaf shape using the Limeade vellum.


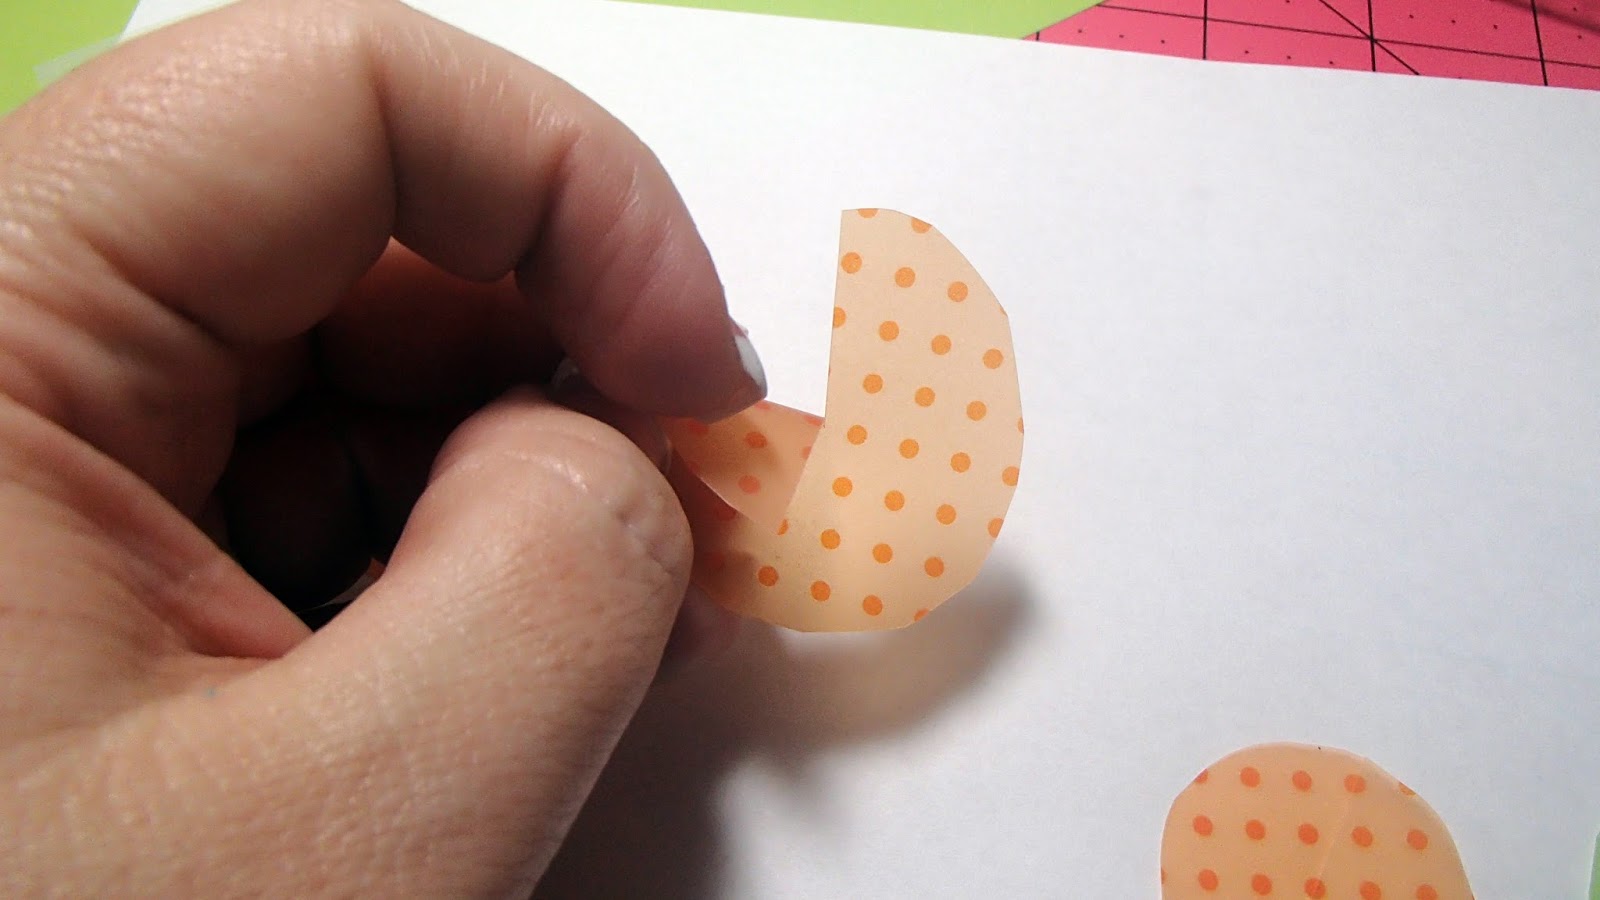
2. Cut each circle and leaf to a center point as shown below.


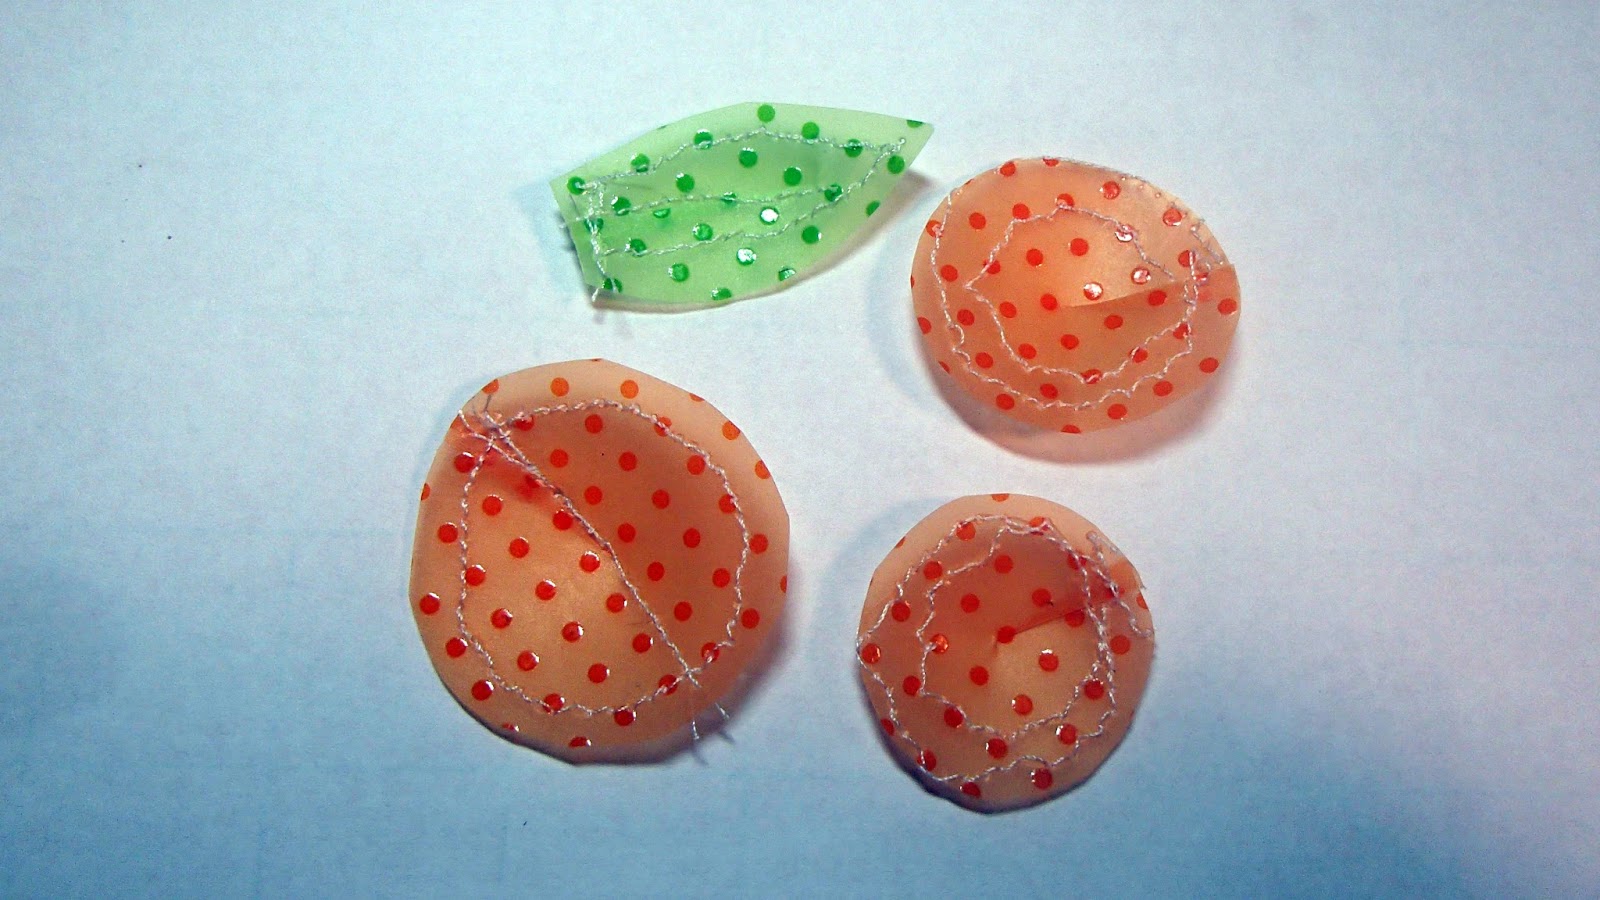
3. Using a wet adhesive slightly overlap the previous cut area and adhere together. This will make the circles cup a little.


4. Once dry, using a sewing machine sew in a circle around the outside edges of the circles. Don't worry if your sewing isn't perfect. It gives more character when it's not perfect or at least that is my story, and I am sticking to it. :)


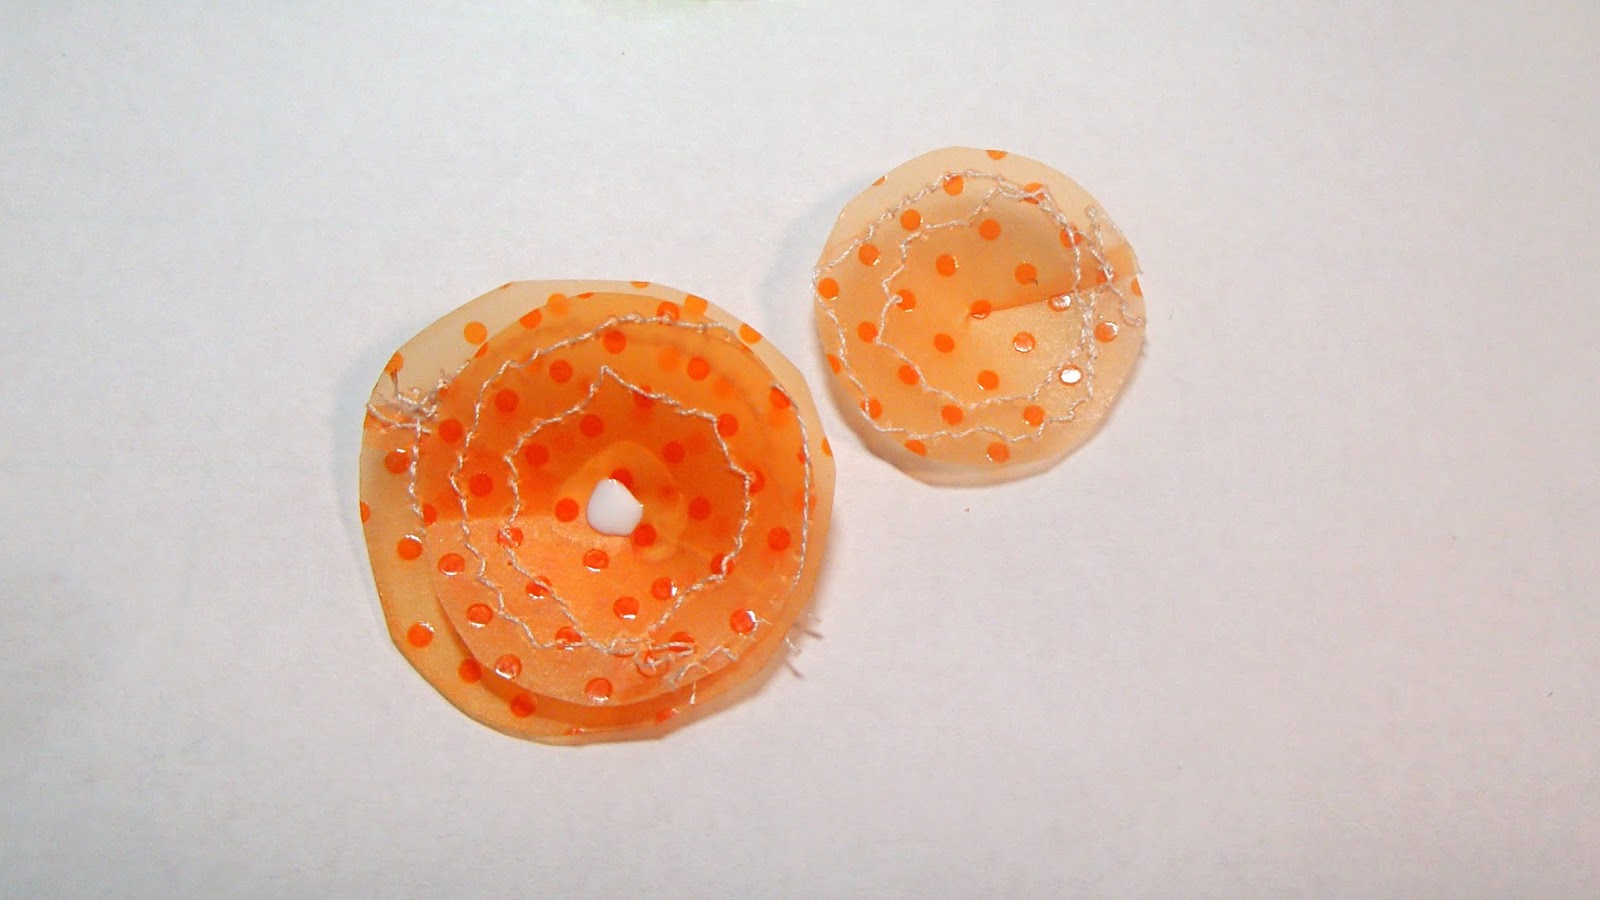
5. Using a small dab of your wet adhesive in the middle of your biggest circle and adhering the medium size flower to it then adding more wet adhesive to the medium size circle to adhere the smallest one to.


6. Add a brad to the middle and use on your layouts or cards for a fun DIY vellum flower.


March 23, 2015

Little Blue House "Bunny Hop" Blog Hop

Welcome to the Little Blue House “Bunny Hop” Blog Hop


The Little Blue House is hosting a fun blog hop and each of the design team members have done a tutorial to share with you on their blogs. All you have to do is follow and comment on each of the design teams blogs for a chance to win the grand prize, an Easter Basket filled with tons of goodies. I have provided the design team blog links after my tutorial. Also, make sure to check out The Little Blue House's Blog for more details on the prize.

For my tutorial, I created this super cute Easter card.


Supplies Needed:

Brad
Sewing Machine
Pop Dots
5x7 card
Ruler
Hobby Knife
Standard scrappy supplies... Scissors, adhesives, trimmers.
____________________________________________________________________

1. Start with a 5x7 white card and then cut a 4 ¾ x 6 ¾ piece of paper and another one that is 4 ½ x 3 ½.


2. On the backside of the 4 ½ x 3 ½ piece of paper, trace one of the die cuts from the Echo Park Happy Easter Paper.


3. Then using a ruler and a hobby knife cut slightly inside of the traced line to create a frame.


4. When you flip your frame over it should look this over your die cut piece.


5. Around all the edges of the cut papers, ink up the edges using Tim Holtz Distress Ink Rusty Hinge and then sew around all the edges. Glue down your piece of 4 ¾ x 6 ¾ paper onto your card.


6. Put some Pop dots onto the back of your frame.


7. Then place it onto your card over the die cut like the sample below.


8. Now decorate your card with one of the strips from the Echo Park Happy Easter Paper some of the Doodlebug Fancy Frills Stickers and Doodlebug Sprinkles Vellum


Come back on March 31st for a tutorial on how I made this cute flower with the Doodlebug Sprinkles Vellum


Thank you for visiting and checking out my tutorial! Don't forget to visit all the blog on The Little Blue "Bunny Hop" blog hop, follow and leave a comment for your chance to win the grand prize.

YOU ARE HERE -Nadine http://myscrapnstuff.blogspot.com/


March 20, 2015

Splat - My Scraps & More Sketches #102

Hello, sharing a page I did with an awesome sketch by Ashley Horton for My Scraps & More Sketches. The crosshairs made me think of the pictures I have of my daughter paintballing. On the background, I used some modeling paste and sprayed some different color sprays to represent paintballs splatting on a wall.


MSAM Sketch #102

Product List:

Patterned paper: Cosmo Cricket Get Happy
Embellishments: Enamel Dots from Michael's
Alpha: Cosmo Cricket
Stamps: 7gypsies
Mixed Medias: Modeling paste, Gesso, Tattered Angels Glimmer Mist, Mister Huey's, Heidi Swapp
Writing Tools: Zig
Miscellaneous: TCW Stencil
Sketch Designer: Ashley Horton
Challenge Site: My Scraps & More Sketches

March 18, 2015

March 13, 2015

Hello Selfie - The Little Blue House

Hello, today I am sharing a simple layout tutorial using the super cute Pebbles Inc. Happy Day collection from the Little Blue House Store.

When creating my layouts I don't usually like to use large pieces of patterned papers. So I will use smaller pieces with lots of layers to not drawn the attention away from the picture. In my tutorial, I will show you how I used lots of layers without drawing the attention away from the picture.


Supplies Needed:

1. Pebbles Inc. Happy Day papers and embellishments
2 White Cardstock & 1 other color
3. Spray Inks
4. Grid Stamp or something similar
5. Tim Holz Black Soot Distress Ink
6. 2" Circle punch
7. Sewing machine with black thread or a black pen for faux stitching
8. Pop dots
9. Standard Scrappy Supplies.... adhesives, scissors, paper trimmer
_________________

1. On the white cardstock randomly stamp in a vertical pattern, I used a grid like stamp.


2. Flick a few different colors onto the white cardstock of spray inks.


3. Punch three 2" circles.


4. Fold the circles in half and then cut on the fold line.


5. Tear one of your patterned papers into a strip about 2" wide. Arrange your circle halves like I have in the picture below cut a thin strip of a color cardstock, glued it down and then stitch down the thin cardstock strip. If you don't have a way to sew you can always use a black pen and draw your stitches.


6. Arrange more layers of papers under your picture and the other papers layers. For the cute little word frames, I cut up one of the Happy Day Tag Frames. I pop dotted up some of the Happy Day Icons & Phrase Stickers. A small strip of the American Crafts Burlap with White Dots also added the perfect color contrast behind the picture.


Here are some close-up pictures of the Pebbles Inc. Happy Day papers and embellishments so you can really take in all their cuteness. :)


Thank you for looking! Happy Scrapping!

March 10, 2015

Silly Girl - Canvas Corp Brands

Do you love doodling? Then you will love these Tattered Tangles Papers from Tattered Angels. I used lots of different colors of the Glimmer Mists and some Stained Glass and Glimmer Glam to paint in the fun swirls on this layout. On the background sprayed Glimmer Mist and let it run down the page to create a cool effect. I even doodled my own title using the Zentangles style.


Materials:
2. Tattered Tangled: "Stripes, Little Stripes, Quotes"
3. Glimmer Mist: "Electric Blue, Trunk Bay, Summer Glow, Marmalade"
4. Simply Sheer: "Vintage Blue"
5. Stained Glass: "Orange"
6. Glimmer Glam: "Butterscotch"

Tools:
1. Scissors
2. Paintbrush
3. Pop dots
4. Black Pen

March 7, 2015

Beachin It - My Scraps & More Sketches #101

Hey everyone! My Scraps & More Sketches has a new sketch up and even though it's rather simple I had a lot of fun with it. I kept wanting to add more layers but even though for me it's a pretty simple page I really like how it turned out.


I had to show this close up of the Wink of Stella Gold Glitter Brush from The Little Blue House. I used it to draw the lines of the rays and also flicked some of it on my page by squeezing the pen and then tapping it against a paintbrush handle to make it splatter onto my page. I love how much glitter are in these pens!! 


 MSAM Sketch #101