Showing posts with label Tags & ATC's. Show all posts

September 8, 2022

Large Halloween Tag

 Hello! Today I have a large Halloween tag that I made to share with you all.


Some of the products I have used in this post have been provided to me by various companies. The opinions I share are solely my own. Affiliate links may be used where possible at no cost to you. However, I do earn a small commission when you click on my link and make a purchase from them. Thank you, and I appreciate your support!

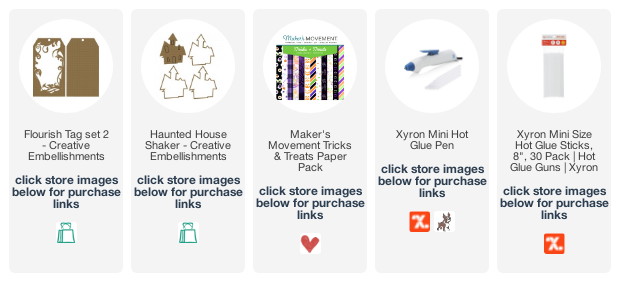
I used the large Creative Embellishments Flourish Tag Set 2 and added some spooky Halloween patterned paper to the back tag.  Then I sprayed the top flourish piece of the tag with some Walnut Spray to give it a distressed wood look and adhered to the back piece I adhered to the Halloween paper. I also sprayed all the layers of the Haunted House Shaker with walnut spray, adhered the layers together, and added some black star shaker sequins inside before adding the clear layer and last layer of the shaker.
Then I added some flowers and cheesecloth that I had sprayed black around the shaker piece and adhered it all together.


Interested in the products I used? For your convenience, products that are still available are linked to multiple shops below. Lists may contain affiliate links where possible at no additional cost to you. When you click on my links and make a purchase, I earn a small percentage of the sale. This helps me to be able to keep creating and maintaining this website. Even though I design for several companies, I still purchase many of my own supplies. However, I do receive some free products to work with, and I sometimes make money for the projects I make. I DO NOT get paid for product reviews, I give my honest opinion about the products I use, and I will never recommend a product that I do not like or would not use.
Affiliate and product disclosure and privacy policy can be found here.
June 21, 2022

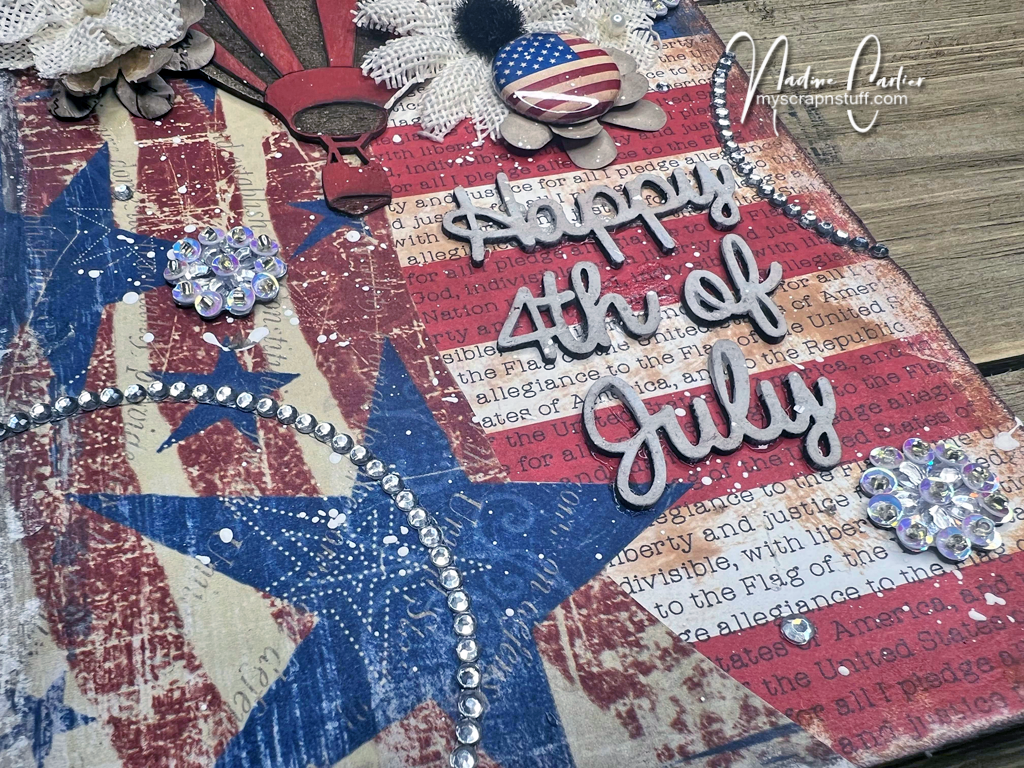
4th of July Mixed Media Tag

It is hard to believe it is almost the 4th of July already. Seems like this year just started. So in honor of the 4th, I decided to create a 4th of July mixed media tag.

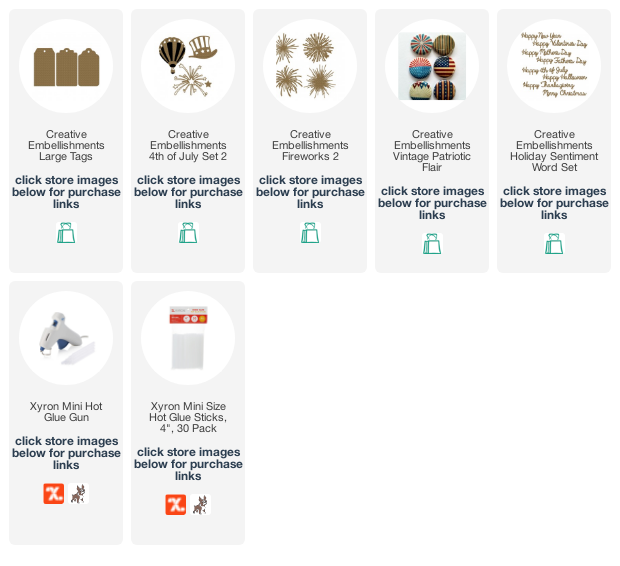
I used one of the Large Chipboard Tags from Creative Embellishments and adhered some patterned paper onto it and sanded the edges to distress it a little. Then I painted the hot air balloon from the Creative Embellishments Summer 4th of July Set 2 with a thin layer of blue and red acrylic paint. I also painted one of the Creative Embellishments Fireworks 2 with a thin layer of white acrylic paint.

I adhered the firework and hot air balloon with some flowers to the front of the tag with Xyron Mini Glue Gun. I also added one of the flairs from the Creative Embellishments Vintage Patriotic Flair Set. Lastly, I painted the Happy 4th of July sentiment from the Creative Embellishments Holiday Sentiment Word Set with white acrylic paint.

Interested in the products I used? Products that are still available are linked to multiple shops below, for your convenience. Lists may contain affiliate links where possible at no cost to you, whatsoever. Affiliate and product disclosure can be found here.
I design for several companies because I genuinely love their products! Anything I recommend on my blog is something that I genuinely love and regularly use. I buy most of my own supplies. However, I do receive some free products to work with, and I sometimes make money for the projects I make. I DO NOT get paid for product reviews, I give my honest opinion about the products I use, and I will never recommend a product that I do not like or would not use.

June 13, 2022

Mixed Media Large Chipboard Tag

Hello! Today I am sharing a large mixed media chipboard tag.

Some of the products I have used in this post have been provided to me by various companies. The opinions I share are solely my own. Affiliate links may be used where possible at no cost to you. However, I do earn a small commission when you click on my link and make a purchase from them. Thank you, and I appreciate your support!

I started with one of the Creative Embellishments Large Tags and used some Light and Fluffy Modeling Paste from The Crafter's Workshop, and The Crafter's Workshop Galaxy Stencil by using the stars and dots from it to create some texture on the tag. Then I painted the tag with The Crafter's Workshop White Gesso. Next, I sprinkled on some ColorSparx from The Crafter's Workshop in Wisteria, Turquoise, and Sepia and sprayed it with water so the powders spread over the tag. Then I dried it with a heat gun. I added a piece of corrugated cardstock and wrapped some twine around it and added some kraft paper flowers.

Then, I took the Creative Embellishments Grunge Heart Corner and painted it with white gesso and sprinkled some ColorSparx on it in Wisteria, and heat dried it. Then adhered it over the flower cluster with my Xyron Mini Multi-Stick Glue Gun. Added some pearls and stickers and then I was done.


Interested in the products I used? Products that are still available are linked to multiple shops below, for your convenience. Lists may contain affiliate links where possible at no cost to you, whatsoever. Affiliate and product disclosure can be found here.
I design for several companies because I genuinely love their products! Anything I recommend on my blog is something that I genuinely love and regularly use. I buy most of my own supplies. However, I do receive some free products to work with, and I sometimes make money for the projects I make. I DO NOT get paid for product reviews, I give my honest opinion about the products I use, and I will never recommend a product that I do not like or would not use.

November 19, 2020

Christmas Rainbow Banner

 Hello! I was sent a box of fun products from scrapbook.com and was challenged to make a holiday project using all of it. Seemed easy enough, except none of it was actually "holiday" related. Luckily I enjoy a good challenge!
So here is my rainbow Christmas banner :)


Some of the products I have used in this post have been provided to me by scrapbook.com. The opinions I share are solely my own. Affiliate links may be used where possible at no cost to you. However, I do earn a small commission when you click on my links and make a purchase from them. Thank you, and I appreciate your support!

 At first, I was completely clueless about how I was going to use rainbows on a Christmas project but then it came to me and I decided to make a banner. I used the Scrapbook.com Jumbo Decorative Die Nested Flag Banners Set with the Scrapbook.com Christmas Smooth Cardstock Paper Pad to cut out some banners.
Then using the Scrapbook.com Decorative Die Set Rainbow Wishes and cut it out using the Scrapbook.com Flat Card Front Paper and then on each arch of the rainbow I used Distress Inks and Scrapbook.com Ink Blending Tool with Domed Foam Applicator to add color to each arch in rainbow colors. Then I added some Scrapbook.com Glitter Brush Marker Clear Shimmer to give it some sparkle.
For the words, I used the Scrapbook.com Clear Photopolymer Stamps Classic Alpha Bundle with the Scrapbook.com Premium Hybrid Ink Pad Black to spell out Merry Christmas.
Then I adhered the rainbow using Scrapbook.com Double Sided Adhesive Foam Strips. These strips were great to bend to follow the arch of the rainbow.


For the trees, I used the light green cardstock from the Scrapbook.com Christmas Smooth Cardstock Paper Pad and hand drew a tree and fussy cut it out. I cut out two more for the side banners.
On some red cardstock, I used the Scrapbook.com Little Rainbows Stencils with some Delicata Silvery Shimmer and then added the fussy cut trees to the banner.
Then for some extra embellishments, I added some of the cute Dress My Craft Shaker Elements Carnival Candies.

Interested in the products I used? Products that are still available are linked to multiple shops below, for your convenience.
Lists may contain affiliate links where possible at no cost to you, what so ever. Affiliate and product disclosure can be found here.
I design for several companies because I genuinely love their products! Anything I recommend on my blog is something that I genuinely love and regularly use. I buy most of my own supplies. However, I do receive some free products to work with, and I sometimes make money for the projects I make. I DO NOT get paid for product reviews, I give my honest opinion about the products I use, and I will never recommend a product that I do not like or would not use.

December 22, 2019

Large Mixed Media Steampunk Tag

Hello! Today I am sharing a large mixed media Steampunk tag I made entirely out of chipboard. Grungy mixed media type projects have always been one of my favorite things to create. No rules or rhyme or reason to create them, just start creating with no plan.


Some of the products I have used have been provided to me from various companies I design for. The opinions I share are solely my own, and I only design for companies that I completely love their products.
Affiliate links may be used where possible at no cost to you. However, I do earn a small commission when you click on my links and make a purchase from them. Thank you, and I appreciate your support!

Below is a process video showing exactly how I created my project.
Make sure to subscribe to my YouTube channel and click the bell so you will get updates when I post a new video.


Below are close-up photos showing how I used the Creative Embellishments chipboard and The Crafter's Workshop mixed media products. 


Interested in the products I used? Products that are still available are linked to multiple shops below, for your convenience.
Lists may contain affiliate links where possible at no cost to you, what so ever. Affiliate and product disclosure can be found here.
I design for several companies because I genuinely love their products! Anything I recommend on my blog is something that I genuinely love and regularly use. I buy most of my own supplies. However, I do receive some free products to work with, and I sometimes make money for the projects I make. I DO NOT get paid for product reviews, I give my honest opinion about the products I use, and I will never recommend a product that I do not like or would not use.

November 13, 2019

DIY Christmas Gift Tags

Hello! Today I am sharing how I created my own Christmas gift tags. Some of the fancy gift tags in the store can be pricey so I thought I would make my own.


Some of the products I have used have been provided to me from various companies I design for. The opinions I share are solely my own, and I only design for companies that I completely love their products. Affiliate links may be used where possible at no cost to you. However, I do earn a small commission when you click on my links and make a purchase from them. Thank you, and I appreciate your support!

Below is a video tutorial showing exactly how I created my project.
Make sure to subscribe to my YouTube channel and click the bell so you will get updates when I post a new video.


To create my Christmas gift tags I first painted a sheet of chipboard with a coat of the TCW9001 White Gesso. Once it was dry I sprayed some green color sprays over the chipboard and let that dry. Then using the TCW9036 Champagne Gold Modeling Paste with the TCW875 Pine Needle Print stencil.


Interested in the products I used? Products that are still available are linked to multiple shops below, for your convenience.
Lists may contain affiliate links where possible at no cost to you, what so ever. Affiliate and product disclosure can be found here.
I design for several companies because I genuinely love their products! Anything I recommend on my blog is something that I genuinely love and regularly use. I buy most of my own supplies. However, I do receive some free products to work with, and I sometimes make money for the projects I make. I DO NOT get paid for product reviews, I give my honest opinion about the products I use, and I will never recommend a product that I do not like or would not use.

August 14, 2019

DIY Bookmarks - Perfect For Back To School

Today I am sharing some DIY bookmarks I created that are perfect for a back to school or for a gift for an avid reader.


Poppystamps & Xyron has provided me with some of the product to create this project. The opinions I share are solely my own.

Below is a video tutorial showing exactly how I created the bookmark.
Make sure to subscribe to my YouTube channel and click the bell so you will get updates when I post a new video.


This was my first time ever using the Gemini Foil Press and I had a lot of fun using it with the Poppystamps Lovely Idea die. I really love how you can use any die with this machine. Gives a whole new way to use your dies.  To adhere the little lightbulb die cut I used the Xyron Sticker Maker and then used my Xyron Creative Station Lite with the Xyron Double-Sided Laminate cartridge to laminate my bookmark.


Interested in the products I used? Products are linked to multiple shops below, for your convenience.
Lists may contain affiliate links where possible at no cost to you, what so ever. Affiliate and product disclosure can be found here.
I design for several companies because I truly love their products! Anything I recommend on my blog is something that I genuinely love and regularly use. I buy most of my own supplies. However, I do receive some free product to work with and I sometimes make money for the projects I make. I DO NOT get paid for product reviews, I give my honest opinion about the products I use and I will never recommend a product that I do not like or would not use.

January 10, 2019

Mixed Media Valentine ATC's

Hello! Today I am sharing some mixed media Valentine ATC's that I created using my all time favorite Xyron Creative Station Lite. I love all Xyron products but the Creative Station Lite is the one I go to the most. The cartridges that fit the Creative Station Lite are either a 3" or 5" which suits almost all of my crafty needs. There are many different cartridges for the Creative Station Lite, like the permanent adhesive and also a repositionable adhesive as well.  The adhesives for it do not stop there! There is also a single or a double-sided laminate refill and a laminate magnet refill.
For me, I use the 3" permanent adhesive the most. The permanent adhesive can be used to adhere almost anything. Like I did on my mixed media Valentine ATC's. See for yourself...


Below is a video tutorial showing exactly how I did it and how I used the products.
Make sure to subscribe to my YouTube channel and click the bell so you will get updates when I post a new video.


On these Valentine ATC's I used the Creative Station Lite to adhere on burlap, Rinea Foiled Paper, paper flowers, and cheesecloth.


On these ones, I adhered Rinea Foiled Paper, lace, paper flowers, tulle, cheesecloth, and a button using the Creative Station Lite.


On the last two ATC's I also used my Creative Station Lite to adhere on ribbon, tulle, cheesecloth, paper flowers, burlap, and Rinea Foiled Paper.


See, you really can adhere almost anything with the Creative Station Lite and the permanent adhesive.
Which one is your favorite?


Interested in the products I used? Products are linked to multiple shops below, for your convenience.
Lists may contain affiliate links where possible at no cost to you, what so ever. Affiliate and product disclosure can be found here.