Showing posts with label Other Craft Projects. Show all posts

August 4, 2022

Handprint Jeep Stickers

 My daughter got a Jeep and has been having fun customizing it. She wanted these handprint stickers to go on the side view mirrors. She showed me what she wanted, and I said, "I can do that," so I did.

Some of the products I have used in this post have been provided to me by various companies. The opinions I share are solely my own. Affiliate links may be used where possible at no cost to you. However, I do earn a small commission when you click on my link and make a purchase from them. Thank you, and I appreciate your support!

I first found the color of StyleTechCraft Glossy Vinyl in Pink Fluorescent, which my daughter liked, and found the image that she liked too. Then using my Silhouette Studio Designer and my Silhouette Cameo 4 to cut it out using the glossy vinyl settings. Once it was cut out, I weeded it using the StyleTechCraft Tools and layered it on a piece of StyleTechCraft Clear Grid Transfer Tape.

Then I peeled the backing off and applied it to the side view mirror. Using the StyleTechCraft Blue Felt Squeegee, I rubbed over the top of the transfer tape to make sure the sticker was flat with no bubbles. Then carefully pulled the transfer tape off, leaving the image on the mirror.

Here is what it looks like on both mirrors. So fun! If you look closely at the windshield, you can see where my daughter used the little Jeep that was part of the pieces I weeded out from the handprint.


Interested in the products I used? For your convenience, products that are still available are linked to multiple shops below. Lists may contain affiliate links where possible at no additional cost to you whatsoever. Affiliate and product disclosure can be found here.
I design for several companies because I genuinely love their products! Anything I recommend on my blog is something that I genuinely love and regularly use. I buy most of my own supplies. However, I do receive some free products to work with, and I sometimes make money for the projects I make. I DO NOT get paid for product reviews, I give my honest opinion about the products I use, and I will never recommend a product that I do not like or would not use.
March 21, 2022

DIY Cloud Shaker Keyring

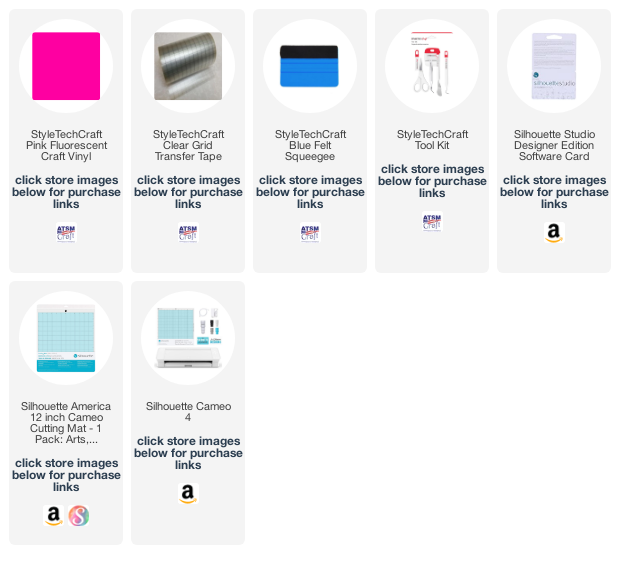
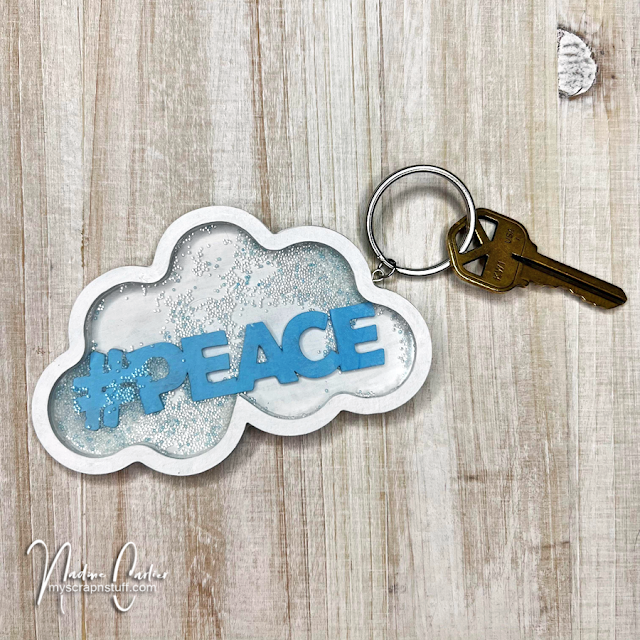
Hello! Today I am sharing a cloud shaker keyring that I created for my daughter.

Some of the products I have used in this post have been provided to me by various companies. The opinions I share are solely my own. Affiliate links may be used where possible at no cost to you. However, I do earn a small commission when you click on my link and make a purchase from them. Thank you, and I appreciate your support!

I first painted each layer of the Creative Embellishments Cloud Shaker white and then once the layers were dry, I then adhered the first frame to the base. Then added one more of the cloud frames on top of that. I then adhered the word peace from the Creative Embellishments Hashtag 2 Set into the middle and added some microbeads for the shaker. Next, I adhered the clear acetate piece that comes with the Cloud Shaker set and then the last cloud frame onto the top. To create the keyring holder, I screwed a small eyelet into the side with a ring on it and added the keyring to that. The hardest part was waiting for the paint and Beacon 3 in 1 adhesive to dry.


December 8, 2021

DIY Rainbow Wall Hanger

 Hello! Today I am sharing a girly rainbow wall hanger that would be a great decoration for a little girl's room.

Some of the products I have used in this post have been provided to me by various companies. The opinions I share are solely my own. Affiliate links may be used where possible at no cost to you. However, I do earn a small commission when you click on my links and make a purchase from them. Thank you, and I appreciate your support!

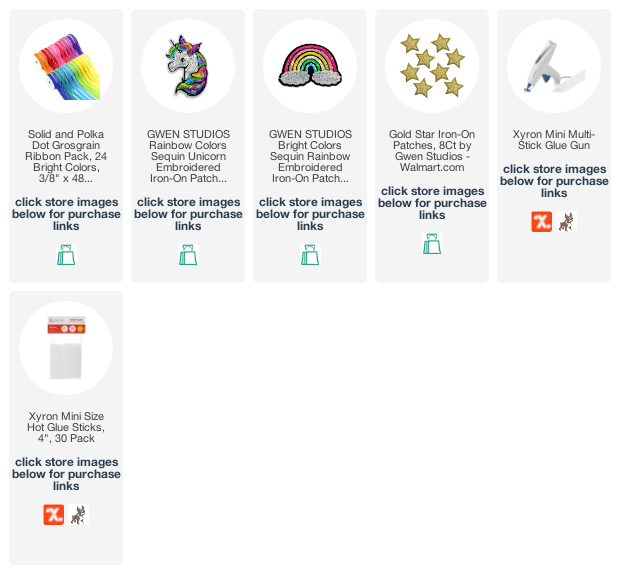
I love the rainbow colors of the Gwen Studios Solid & Polka Dot Grosgrain Ribbon. I cut a strip of each ribbon and adhered each one on using the Xyron Mini Multistick Glue Gun.


Then I adhered on the Gwen Studios Rainbow Sequin Unicorn Patch to the top center of the wall hanger. Then added some Gwen Studios Gold Star Patches and Gwen Studios Rainbow Patches onto some of the ribbons hanging down.

Interested in the products I used? Products that are still available are linked to multiple shops below, for your convenience.
Lists may contain affiliate links where possible at no cost to you, what so ever. Affiliate and product disclosure can be found here.
I design for several companies because I genuinely love their products! Anything I recommend on my blog is something that I genuinely love and regularly use. I buy most of my own supplies. However, I do receive some free products to work with, and I sometimes make money for the projects I make. I DO NOT get paid for product reviews, I give my honest opinion about the products I use, and I will never recommend a product that I do not like or would not use.
December 2, 2021

Artesprix Blog Hop With Designer Crafts Connection

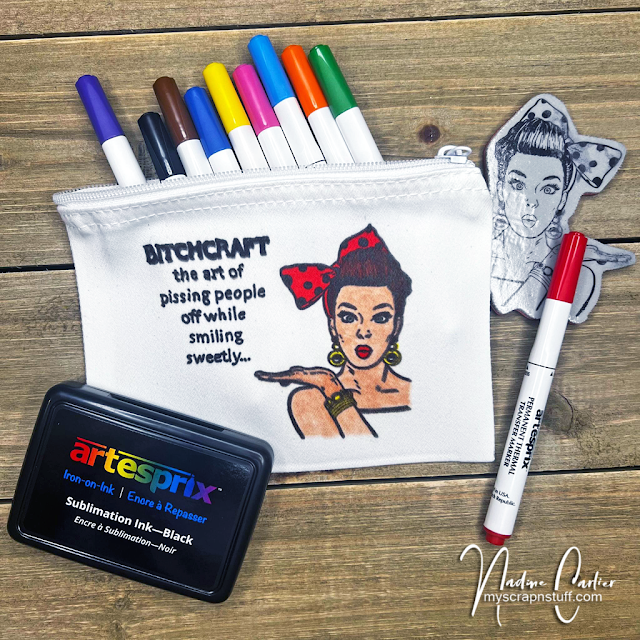
 Hello, crafty friends! Today I am sharing how to do a sublimation transfer onto canvas. This would make a great gift for your craft friends or anyone since you can customize the canvas bag using any kind of stamp image.

Some of the products I have used in this post have been provided to me by various companies. The opinions I share are solely my own. Affiliate links may be used where possible at no cost to you. However, I do earn a small commission when you click on my links and make a purchase from them. Thank you, and I appreciate your support!

I know many of us have a lot of stamps that we do not use. Using them as a sublimation transfer onto canvas is a fun and different way to use them. All of the sublimation products I used are from Artesprix. The snarky stamps are from Crackerbox Stamps.
Below is a video tutorial showing exactly how I created my project.
Make sure to subscribe to my YouTube channel and click the bell so you will get updates when I post a new video.


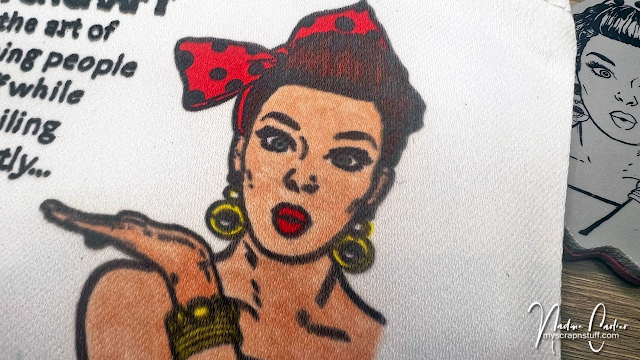
My close-up photos below show how well the images transferred onto the canvas.


Want more inspiration using Artesprix products? Visit the Designer Crafts Connection Blog Post to see what their other designers have created.

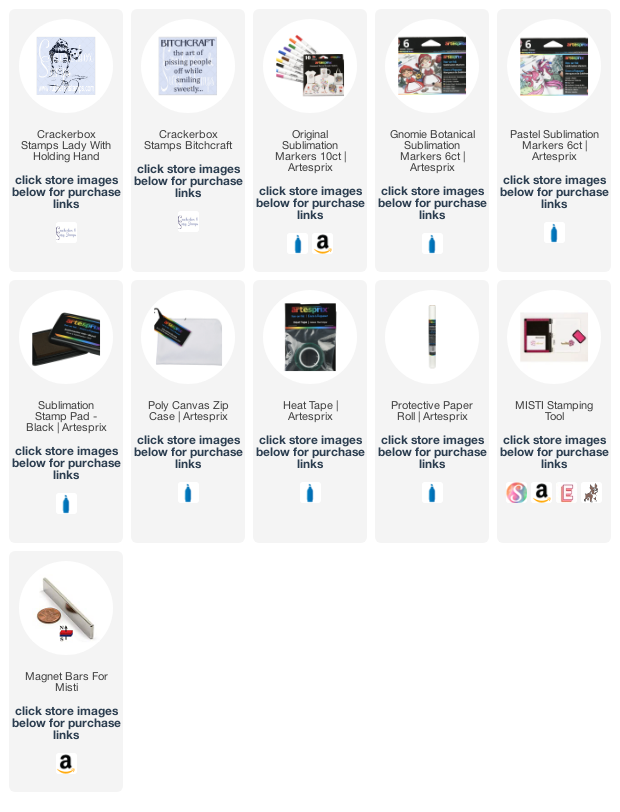
Interested in the products I used? Products that are still available are linked to multiple shops below, for your convenience.
Lists may contain affiliate links where possible at no cost to you, what so ever. Affiliate and product disclosure can be found here.
I design for several companies because I genuinely love their products! Anything I recommend on my blog is something that I genuinely love and regularly use. I buy most of my own supplies. However, I do receive some free products to work with, and I sometimes make money for the projects I make. I DO NOT get paid for product reviews, I give my honest opinion about the products I use, and I will never recommend a product that I do not like or would not use.

October 14, 2021

Turkey Earrings With Grafix Shrink Film

Do you like to wear fun earrings for the holidays? I always see them in the stores for Halloween and Christmas but not sure I have ever seen any for Thanksgiving. So I made some!

Some of the products I have used in this post have been provided to me by various companies. The opinions I share are solely my own. Affiliate links may be used where possible at no cost to you. However, I do earn a small commission when you click on my links and make a purchase from them. Thank you, and I appreciate your support!

I thought the Crackerbox Stamps Turkey Goofy was so cute and that he would make adorable earrings. So using StazOn Ink in Jet Black, I stamped the turkey twice on a sheet of Grafix Shrink Film in Matte.


Then, I colored the turkeys in with Derwent Procolour Pencils and then fussy cut them out. You will get a richer color with pencils once it's shrunk than you will with markers.

After I fussy cut them out, I then punched a small hole in the top of the turkey. *Make sure to punch the hole BEFORE shrinking.

Next, using my heat tool, I shrunk the turkeys. I used a stick to hold the turkey while shrinking and as it shrinks it will curl all up but will flatten back out once it shrinks down to size. To make sure it is good and flat, while it is still hot place something flat on the top as it cools.

The photo below shows how much they shrunk from the original stamp size.


and here my daughter is being my model wearing the cute turkey earrings.


Shrink films are so much fun and easy to do. Grafix has several different types too. I wanted more of a solid base so I went with the matte but could of also probably used the white.

Want more inspiration using Grafix products? Visit the Designer Crafts Connection Blog Post to see what their other designers have created.

Interested in the products I used? Products that are still available are linked to multiple shops below, for your convenience.
Lists may contain affiliate links where possible at no cost to you, what so ever. Affiliate and product disclosure can be found here.
I design for several companies because I genuinely love their products! Anything I recommend on my blog is something that I genuinely love and regularly use. I buy most of my own supplies. However, I do receive some free products to work with, and I sometimes make money for the projects I make. I DO NOT get paid for product reviews, I give my honest opinion about the products I use, and I will never recommend a product that I do not like or would not use.

August 23, 2021

DIY Autumn Animal Print Wreath

 It is hard to believe that Autumn is right around the corner. Seems like summer just started. Autumn is my favorite season and I love fall crafts. I usually make a new fall wreath every year. This year I decided to make an animal print one.

Some of the products I have used in this post have been provided to me by various companies. The opinions I share are solely my own. Affiliate links may be used where possible at no cost to you. However, I do earn a small commission when you click on my links and make a purchase from them. Thank you, and I appreciate your support!

Below is a video tutorial showing exactly how I created my project.
Make sure to subscribe to my YouTube channel and click the bell so you will get updates when I post a new video.


For the animal print, I used the coolest Faux Leather Ribbon by Gwen Studios.
They have several different patterns and it was hard to choose which one I wanted to use but decide on the cheetah one since it matched the fall colors for my wreath. It was super easy to wrap around the foam ring and using the Xyron Multi-Stick Glue Gun to help hold it into place.


I used several leaves and some flowers and also adhered them to the wreath using the Xyron Multi-Stick Glue Gun. I was able to adhere everything to this wreath without having to add any more glue sticks since it holds three glue sticks at once. Which makes it really nice to not have to stop all the time to add another one.


Next, I hung it on my front door ready for the Autumn season.


Interested in the products I used? Products that are still available are linked to multiple shops below, for your convenience.
Lists may contain affiliate links where possible at no cost to you, what so ever. Affiliate and product disclosure can be found here.
I design for several companies because I genuinely love their products! Anything I recommend on my blog is something that I genuinely love and regularly use. I buy most of my own supplies. However, I do receive some free products to work with, and I sometimes make money for the projects I make. I DO NOT get paid for product reviews, I give my honest opinion about the products I use, and I will never recommend a product that I do not like or would not use.

August 6, 2021

Quick Way To Customize Battery Operated Candles

I have had these battery-operated candles for a while now and thought it would be fun to decorate them for the seasons.

Some of the products I have used in this post have been provided to me by various companies. The opinions I share are solely my own. Affiliate links may be used where possible at no cost to you. However, I do earn a small commission when you click on my links and make a purchase from them. Thank you, and I appreciate your support!

To decorate my candles, I used some Fall Leaves Dies from Maker's Movement and die-cut them out of some StyleTechCraft Gold Chrome Craft Vinyl. Then just randomly stuck them to the candles.

Since the candles I used are real wax the vinyl is easy to peel back off again so you can change them out for the next season or holiday. I am thinking about doing snowflakes for winter and using StyleTechCraft White Opal Vinyl. The opal vinyl would be perfect for snowflakes.


Interested in the products I used? Products that are still available are linked to multiple shops below, for your convenience.
Lists may contain affiliate links where possible at no cost to you, what so ever. Affiliate and product disclosure can be found here.
I design for several companies because I genuinely love their products! Anything I recommend on my blog is something that I genuinely love and regularly use. I buy most of my own supplies. However, I do receive some free products to work with, and I sometimes make money for the projects I make. I DO NOT get paid for product reviews, I give my honest opinion about the products I use, and I will never recommend a product that I do not like or would not use.

July 22, 2021

Paper Flower Arrangement Using Dreaming Tree SVG Cut Files

 Today I am sharing a pretty floral planter I made using nothing but paper. I love these kinds of flowers because they last forever. I still love to have fresh flowers but it always makes me sad that they only last for a few days before dying.


Some of the products I have used in this post have been provided to me by various companies. The opinions I share are solely my own. Affiliate links may be used where possible at no cost to you. However, I do earn a small commission when you click on my links and make a purchase from them. Thank you, and I appreciate your support!

To create this pretty floral planter, I used an SVG cut file from Dreaming Tree. It is called Patriotic Floral Planter SVG and they show it being made for the 4th of July but I wanted to change it up some and make it into a bright and cheery summer planter. It was super easy to cut out using my Silhouette Cameo 4 and Design Studio Software.


I used different shades of yellow and orange patterned papers to create the flowers to give them a Gerber Daisy look. For the centers, I used some Rinea Foiled Paper in Mocha Starstruck and for the leaves, I used two different colors of green cardstock. For the planter, I used brown woodgrain paper and some Rinea Foiled Paper in Gold Glossy around the bottom.
Dreaming Tree has a great video tutorial showing how to assemble the floral planter. I changed it up a little since I didn't have wire or floral tape so I used wood skewers and painted them green for the stems of the flowers. I used Xyrons Mini Multi-Stick Glue Gun to adhere my flowers together.
To watch a video on how I created the crate paper butterflies, CLICK HERE.


Want to see more creations using SVG cut files from Dreaming Tree? Visit the Designer Crafts Connection Blog Post to see what their other designers created.

Interested in the products I used? Products that are still available are linked to multiple shops below, for your convenience.
Lists may contain affiliate links where possible at no cost to you, what so ever. Affiliate and product disclosure can be found here.
I design for several companies because I genuinely love their products! Anything I recommend on my blog is something that I genuinely love and regularly use. I buy most of my own supplies. However, I do receive some free products to work with, and I sometimes make money for the projects I make. I DO NOT get paid for product reviews, I give my honest opinion about the products I use, and I will never recommend a product that I do not like or would not use.