Showing posts with label Thanksgiving & Autumn. Show all posts

November 8, 2023

Funny Thanksgiving Interactive Turkey Wobble Card

 Hello! Today, I am sharing a funny Thanksgiving interactive turkey wobble card.

Some of the products I have used in this post have been provided to me by various companies. The opinions I share are solely my own. Affiliate links may be used where possible at no cost to you. However, I will earn a small commission when you click my links and purchase products from them. Thank you, and I appreciate your support!

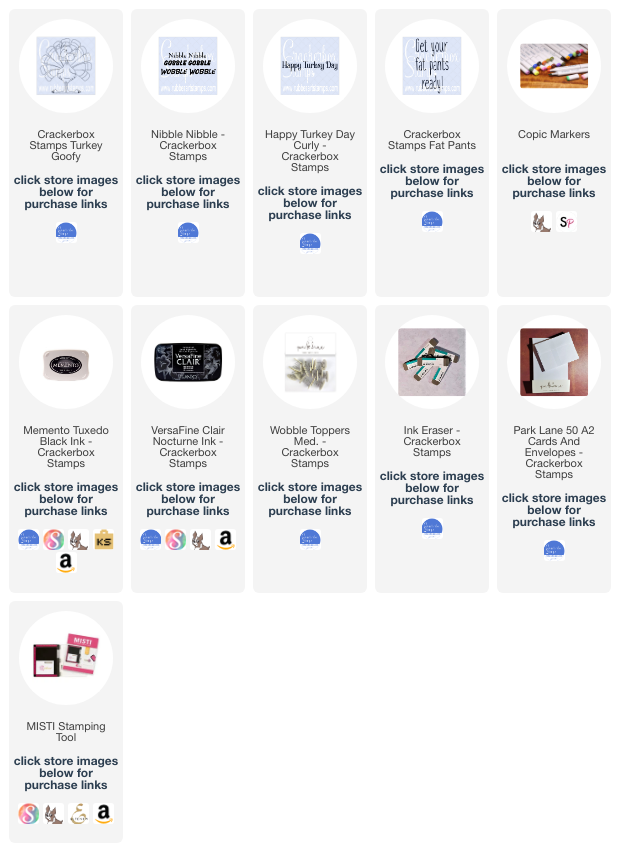
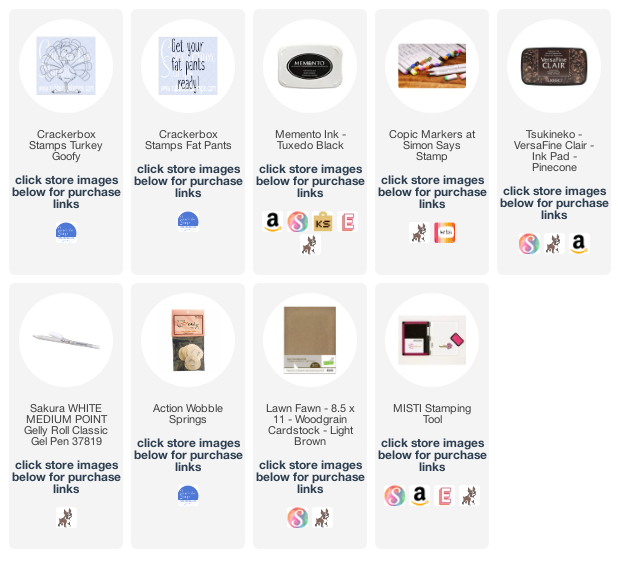
I stamped and colored the Crackerbox Stamps Goofy Turkey with Copic Markers and then fussy cut him out. I die cut a circle out of a corner of patterned paper and then attached a Wobble Topper Med. to the back of the turkey and attached him in the middle of the circle so he would wobble around on the front of the card.
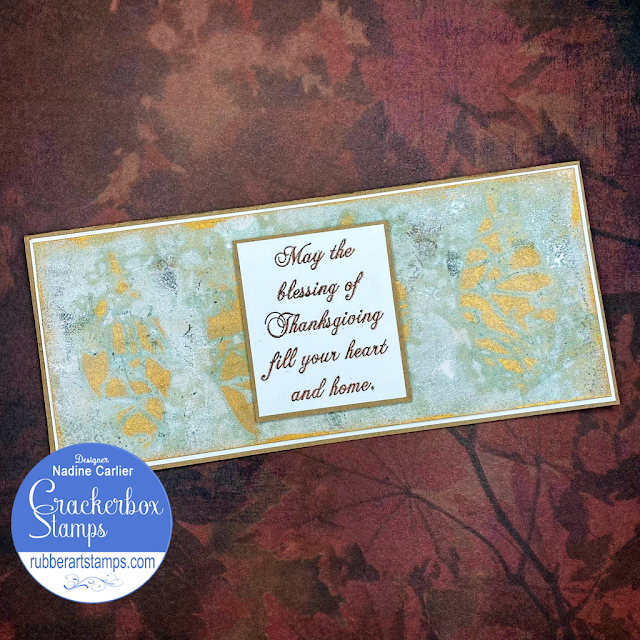
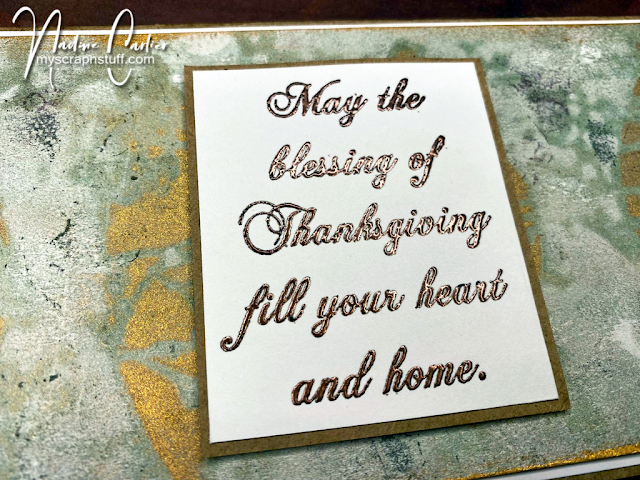
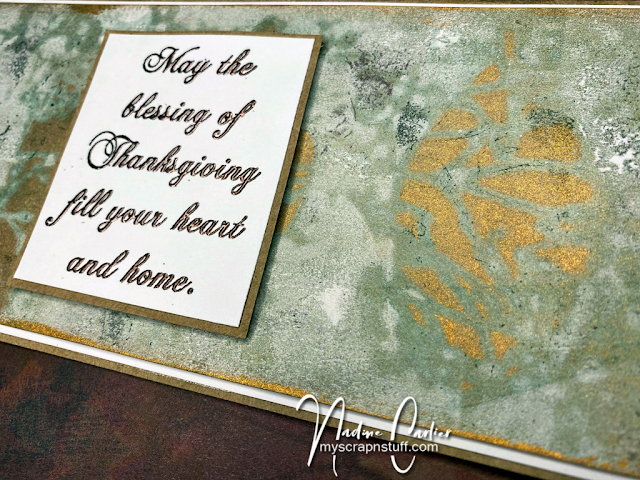
I stamped the Crackerbox Stamps Nibble Nibble sentiment with VersaFine Clair Nocturne Ink on the front of the card.


Interested in the products I used? For your convenience, products that are still available are linked to multiple shops below. Lists may contain affiliate links where possible at no additional cost to you. I earn a small percentage of the sale when you click on my links and purchase items. This helps me to keep creating and maintaining this website. Even though I design for several companies, I still need to purchase supplies. I DO NOT get paid for product reviews. I give my honest opinion about the products I use, and I will never recommend a product I do not like or would not use. Affiliate and product disclosure and privacy policy can be found here.

August 23, 2023

Summer's Wave Goodbye Autumn Card

Hello! Today, I am sharing a pretty pink Summer's wave goodbye Autumn card. I decided to do something different and not use the normal Fall colors and use pinks instead.

Some of the products I have used in this post have been provided to me by various companies. The opinions I share are solely my own. Affiliate links may be used where possible at no cost to you. However, I will earn a small commission when you click on my link and purchase from them. Thank you, and I appreciate your support!

On the card front, I blended some Memento Angel Pink Ink using a blending brush. Then I stamped the Crackerbox Stamps Blowing Leaves with VersaMark, and heat embossed it with gold embossing powder. I used a Copic Marker RV34 to color the leaves.
Then I stamped the Crackerbox Stamps Fallen Leaf sentiment with VersaMark, and heat embossed it with gold embossing powder. Then I mounted it with some gold glitter cardstock and then on the card base.

Interested in the products I used? For your convenience, products that are still available are linked to multiple shops below. Lists may contain affiliate links where possible at no additional cost to you. When you click on my links and make a purchase, I earn a small percentage of the sale. This helps me to keep creating and maintaining this website. Even though I design for several companies, I still purchase many supplies on my own. I do receive some free products to work with, and I sometimes make money for the projects I make. I DO NOT get paid for product reviews. I give my honest opinion about the products I use, and I will never recommend a product that I do not like or would not use. Affiliate and product disclosure and privacy policy can be found here.

October 18, 2022

Thanksgiving Turkey Wobble Card

  Hello! Today I am sharing a cute Thanksgiving Turkey wobble card.


Some of the products I have used in this post have been provided to me by various companies. The opinions I share are solely my own. Affiliate links may be used where possible at no cost to you. However, I do earn a small commission when you click on my link and make a purchase from them. Thank you, and I appreciate your support!

I started with a kraft woodgrain card base, and a piece of mustard color textured cardstock cut smaller than the card base. I stamped the Crackerbox Stamps Turkey Goofy stamp and colored him in with Copic Markers, then fussy cut him out. I die cut out a circle on the bottom corner of the mustard cardstock piece making sure it was slightly bigger than the turkey. Then I stamped the Crackerbox Stamps Fat Pants sentiment on the mustard piece with VersaFine Clair in Pinecone. I outlined some of the sentiment letters with a white gel pen. Then I adhered everything together and added the turkey to the cutout circle area using an Action Wobble Spring.


Interested in the products I used? For your convenience, products that are still available are linked to multiple shops below. Lists may contain affiliate links where possible at no additional cost to you. When you click on my links and make a purchase, I earn a small percentage of the sale. This helps me to be able to keep creating and maintaining this website. Even though I design for several companies, I still purchase many of my own supplies. However, I do receive some free products to work with, and I sometimes make money for the projects I make. I DO NOT get paid for product reviews, I give my honest opinion about the products I use, and I will never recommend a product that I do not like or would not use. Affiliate and product disclosure and privacy policy can be found here.

October 9, 2022

Autumn Card With A Layered Stencil

 Hello! Today I am sharing an Autumn card I made. I have always loved the colors of Autumn.

Some of the products I have used in this post have been provided to me by various companies. The opinions I share are solely my own. Affiliate links may be used where possible at no cost to you. However, I do earn a small commission when you click on my link and make a purchase from them. Thank you, and I appreciate your support!

I used The Crafter's Workshop Pressed Petals Layered Stencil. There are three stencils, A, B, & C, with this layered stencil. I started with the layer C stencil and some cream-colored cardstock. With the stencil lying on the cardstock, I sprinkled some The Crafter's Workshop ColorSparx in Gamboge & Marigold over the stencil and sprayed it with water to activate the powder. Then, the stencil was removed and sprayed again lightly, so the image spread slightly to look like watercolor.


I used a heat tool to dry it. Then placed the stencil back over the cardstock piece, outlined each flower with a white gel pen, and then again with a brown marker. Next, I colored the outlined areas with a Glitter Marker Pen in gold.
Using the layer B stencil and some The Crafter's Workshop Tacky-When-Dry Gel, then let it dry. Once it was dry, I used some The Crafter's Workshop Terre Verte Foil Transfer. I pressed the dull side of the foil down on top of the Tacky-When-Dry Gel and rubbed the foil to make sure it was pressed into the gel well. Then I removed the foil piece, when removed, the foil was stuck to the areas where the gel was.


The next stencil I used was layer A stencil, and I used The Crafter's Workshop Stardust Butter Champagne.


I stamped the Crackerbox Stamps Autumn Dancing stamp with VersaMark and then heat embossed it with copper embossing powder.


Interested in the products I used? For your convenience, products that are still available are linked to multiple shops below. Lists may contain affiliate links where possible at no additional cost to you. When you click on my links and make a purchase, I earn a small percentage of the sale. This helps me to be able to keep creating and maintaining this website. Even though I design for several companies, I still purchase many of my own supplies. However, I do receive some free products to work with, and I sometimes make money for the projects I make. I DO NOT get paid for product reviews, I give my honest opinion about the products I use, and I will never recommend a product that I do not like or would not use. Affiliate and product disclosure and privacy policy can be found here.

September 26, 2022

Give Thanks Pumpkin Card

 Hello! Today I am sharing a give thanks pumpkin card that I made with a slight whimsical twist.

Some of the products I have used in this post have been provided to me by various companies. The opinions I share are solely my own. Affiliate links may be used where possible at no cost to you. However, I do earn a small commission when you click on my link and make a purchase from them. Thank you, and I appreciate your support!

I decided to make my card in nontraditional colors by using the Maker's Movement An Autumn Breeze Paper Pack. I used one of the polka dot papers from the paper pad and die-cut out the pumpkin using the Maker's Movement Pumpkin Card Die Set from the center of the paper. I used the remaining polka dot paper to adhere to my 6x6 card front. Using another piece of paper from the paper, with a light blue and plus signs on it, I adhered that over the polka dot piece so you couldn't see the missing area of where I cut the pumpkin out. I attached the pumpkin to the front of the card using some foam adhesive tape.

I cut out some leaves using another piece of paper from the Maker's Movement An Autumn Breeze Paper Pack and the Maker's Movement Pumpkin Card Die Set. Using a piece of brown cardstock, I cut out the stem and vines for the pumpkin. I inked up the edges slightly, and using a brown pen, I traced the embossed areas of the die cuts, so they stood out more. I used a white gel pen on the leaves to draw the lines on them and also drew a frame around the outside of the pumpkin and on the background piece. To finish my card, I die-cut out the sentiment using the same paper I used for the leaves and added it to the front of my card, then added a bow to the stem.


Interested in the products I used? For your convenience, products that are still available are linked to multiple shops below. Lists may contain affiliate links where possible at no additional cost to you. When you click on my links and make a purchase, I earn a small percentage of the sale. This helps me to be able to keep creating and maintaining this website. Even though I design for several companies, I still purchase many of my own supplies. However, I do receive some free products to work with, and I sometimes make money for the projects I make. I DO NOT get paid for product reviews, I give my honest opinion about the products I use, and I will never recommend a product that I do not like or would not use.
Affiliate and product disclosure and privacy policy can be found here.

November 14, 2021

Thanksgiving Slimline Card

 Hello! Today I am sharing a Thanksgiving slimline card.

Some of the products I have used in this post have been provided to me by various companies. The opinions I share are solely my own. Affiliate links may be used where possible at no cost to you. However, I do earn a small commission when you click on my links and make a purchase from them. Thank you, and I appreciate your support!

I used the Crackerbox Stamps Blessing of Thanksgiving Stamp, stamped it with VersaMark and heat embossed it with copper embossing powder. Then to help the beautiful sentiment to stand out on the front of the slimline card I created a background.


To create the background, I first applied some green ink to a Gel Press and pressed a piece of white cardstock onto the Gel Press. Then I used some gold metallic ink on the Gel Press and placed The Crafter's Workshop Leaf Study Slimline Stencil onto the Gel Press and then the same piece of cardstock over the stencil.


Interested in the products I used? Products that are still available are linked to multiple shops below, for your convenience.
Lists may contain affiliate links where possible at no cost to you, what so ever. Affiliate and product disclosure can be found here.
I design for several companies because I genuinely love their products! Anything I recommend on my blog is something that I genuinely love and regularly use. I buy most of my own supplies. However, I do receive some free products to work with, and I sometimes make money for the projects I make. I DO NOT get paid for product reviews, I give my honest opinion about the products I use, and I will never recommend a product that I do not like or would not use.

October 19, 2021

Thanks Autumn Leaf Card

 Hello! Today I am sharing a Thanks Autumn Leaf card that I made.

Some of the products I have used in this post have been provided to me by various companies. The opinions I share are solely my own. Affiliate links may be used where possible at no cost to you. However, I do earn a small commission when you click on my links and make a purchase from them. Thank you, and I appreciate your support!

To create my card, the first thing I did was create the background for the leaf. To do that, I used a piece of the The Crafter's Workshop Watercolor Paper Pack sprayed it with water and then sprinkled on some of the The Crafter's Workshop ColorSparx® in Grasslands, and then sprayed it with water again. Then dried it using my heat tool.
Once it was dry, I placed the The Crafter's Workshop Skeletal Leaf over it and used a VersaMark ink pad over the stencil. Once I felt it was inked up well I poured on some gold embossing powder and heat set it with my heat gun. Then I fussy cut out the leaf.
I die cut out a white frame to add to the front of the dark brown card base and then attached the leaf to the front of the card and added a die-cut sentiment.


Interested in the products I used? Products that are still available are linked to multiple shops below, for your convenience.
Lists may contain affiliate links where possible at no cost to you, what so ever. Affiliate and product disclosure can be found here.
I design for several companies because I genuinely love their products! Anything I recommend on my blog is something that I genuinely love and regularly use. I buy most of my own supplies. However, I do receive some free products to work with, and I sometimes make money for the projects I make. I DO NOT get paid for product reviews, I give my honest opinion about the products I use, and I will never recommend a product that I do not like or would not use.

October 18, 2021

Picking Pumpkins Scrapbook Layout

Hello! It is time to get those picking pumpkin photos scrapped. You know, those ones that have been in a box, on your phone or computer forever. Or am I the only one who has pictures still from over 10 years ago that I haven't scrapped yet?

Some of the products I have used in this post have been provided to me by various companies. The opinions I share are solely my own. Affiliate links may be used where possible at no cost to you. However, I do earn a small commission when you click on my links and make a purchase from them. Thank you, and I appreciate your support!

I am loving the simplicity of this layout, which is not a typical kind of layout for me. I painted one of the Creative Embellishments Pumpkins (it comes with 3 pumpkins) with some orange and green acrylic paint.

I also painted 2 of the 4 pieces of the Creative Embellishments Pumpkin Vine Flourish with green acrylic paint. To adhere all the chipboard pieces to my layout, I used the Xyron Mini Hot Glue Pen. This hot glue pen works great when you thin areas like on the vines you need to add hot glue too because of the pen tip.


Interested in the products I used? Products that are still available are linked to multiple shops below, for your convenience.
Lists may contain affiliate links where possible at no cost to you, what so ever. Affiliate and product disclosure can be found here.
I design for several companies because I genuinely love their products! Anything I recommend on my blog is something that I genuinely love and regularly use. I buy most of my own supplies. However, I do receive some free products to work with, and I sometimes make money for the projects I make. I DO NOT get paid for product reviews, I give my honest opinion about the products I use, and I will never recommend a product that I do not like or would not use.

October 14, 2021

Turkey Earrings With Grafix Shrink Film

Do you like to wear fun earrings for the holidays? I always see them in the stores for Halloween and Christmas but not sure I have ever seen any for Thanksgiving. So I made some!

Some of the products I have used in this post have been provided to me by various companies. The opinions I share are solely my own. Affiliate links may be used where possible at no cost to you. However, I do earn a small commission when you click on my links and make a purchase from them. Thank you, and I appreciate your support!

I thought the Crackerbox Stamps Turkey Goofy was so cute and that he would make adorable earrings. So using StazOn Ink in Jet Black, I stamped the turkey twice on a sheet of Grafix Shrink Film in Matte.


Then, I colored the turkeys in with Derwent Procolour Pencils and then fussy cut them out. You will get a richer color with pencils once it's shrunk than you will with markers.

After I fussy cut them out, I then punched a small hole in the top of the turkey. *Make sure to punch the hole BEFORE shrinking.

Next, using my heat tool, I shrunk the turkeys. I used a stick to hold the turkey while shrinking and as it shrinks it will curl all up but will flatten back out once it shrinks down to size. To make sure it is good and flat, while it is still hot place something flat on the top as it cools.

The photo below shows how much they shrunk from the original stamp size.


and here my daughter is being my model wearing the cute turkey earrings.


Shrink films are so much fun and easy to do. Grafix has several different types too. I wanted more of a solid base so I went with the matte but could of also probably used the white.

Want more inspiration using Grafix products? Visit the Designer Crafts Connection Blog Post to see what their other designers have created.

Interested in the products I used? Products that are still available are linked to multiple shops below, for your convenience.
Lists may contain affiliate links where possible at no cost to you, what so ever. Affiliate and product disclosure can be found here.
I design for several companies because I genuinely love their products! Anything I recommend on my blog is something that I genuinely love and regularly use. I buy most of my own supplies. However, I do receive some free products to work with, and I sometimes make money for the projects I make. I DO NOT get paid for product reviews, I give my honest opinion about the products I use, and I will never recommend a product that I do not like or would not use.