August 9, 2023

A Little Crazy Hyena Card

 Hello! Today I am sharing a little crazy hyena card with you that I made.

Some of the products I have used in this post have been provided to me by various companies. The opinions I share are solely my own. Affiliate links may be used where possible at no cost to you. However, I will earn a small commission when you click on my link and purchase from them. Thank you, and I appreciate your support!

I created my background by using a Visible Images Time Tunnel Stencil and a blending brush with some yellow inks. Then I stamped the Crackerbox Stamps You Should Always Crazy sentiment and also the Crackerbox Stamps Psycho Hyena Critter over the stenciled background. I then stamped the Psycho Hyena Critter again on a piece of white cardstock and colored him with Copic Markers.

Then fussy cut him out and adhered him over the image I stamped on the background. I did this so the little strands of hair on his head would show after I fussy cut him out. With a light gray Copic Marker, I added some shadows around his feet for some dimension.

Interested in the products I used? For your convenience, products that are still available are linked to multiple shops below. Lists may contain affiliate links where possible at no additional cost to you. When you click on my links and make a purchase, I earn a small percentage of the sale. This helps me to keep creating and maintaining this website. Even though I design for several companies, I still purchase many supplies on my own. I do receive some free products to work with, and I sometimes make money for the projects I make. I DO NOT get paid for product reviews, I give my honest opinion about the products I use, and I will never recommend a product that I do not like or would not use. Affiliate and product disclosure and privacy policy can be found here.

August 7, 2023

Immature Forever Giraffe Slimline Card

  Hello! Today I am sharing an immature forever giraffe slimline card that would be perfect for a birthday.

Some of the products I have used in this post have been provided to me by various companies. The opinions I share are solely my own. Affiliate links may be used where possible at no cost to you. However, I will earn a small commission when you click on my link and purchase from them. Thank you, and I appreciate your support!

I first die-cut out the card front using white cardstock and then matted it with some leaf-patterned paper and then some orange-patterned paper. Then using two square dies, I cut out the squares in the card front. Using another piece of white cardstock and making sure it was big enough to fit behind the two square cutouts and then lightly traced the squares onto it.

Next, I stamped the Crackerbox Stamps Rafferty The Giraffe onto the white cardstock piece using the traced lines to guide where to stamp him. Around the giraffe image, I ink blended some green ink and colored the giraffe with Copic Markers. Then attached the giraffe piece to the back of the card front so the giraffe was looking through the square windows and attached the entire card front to a card base.
Then stamped the Crackerbox Stamps Immature Forever sentiment above the giraffe on the card front using green and black ink.

Interested in the products I used? For your convenience, products that are still available are linked to multiple shops below. Lists may contain affiliate links where possible at no additional cost to you. When you click on my links and make a purchase, I earn a small percentage of the sale. This helps me to keep creating and maintaining this website. Even though I design for several companies, I still purchase many supplies on my own. I do receive some free products to work with, and I sometimes make money for the projects I make. I DO NOT get paid for product reviews, I give my honest opinion about the products I use, and I will never recommend a product that I do not like or would not use. Affiliate and product disclosure and privacy policy can be found here.

August 6, 2023

25 Again Snarky Birthday Card

 Hello! Today I am sharing a 25 again snarky birthday card that I made.

Some of the products I have used in this post have been provided to me by various companies. The opinions I share are solely my own. Affiliate links may be used where possible at no cost to you. However, I will earn a small commission when you click on my link and purchase from them. Thank you, and I appreciate your support!

I first stamped the Crackerbox Stamps Fish Bowl and then stamped the Crackerbox Stamps Bernice Angel Fish inside the bowl. Then I stamped the Crackerbox Stamps Dot Splatters in blue ink to make them look like bubbles coming from the fish. I then colored all the images with Copic Markers and then fussy cut out the fish bowl.
Next, I stamped the Crackerbox Stamps 25 Again sentiment on a piece of white cardstock for my card front. Then using an embossing folder, I embossed the card's front piece and lightly ran some Delicata Champagne Ink over the raised embossed areas. Matted the card front with some orange cardstock and adhered it to my card base, and added the fishbowl just below the sentiment.


On the inside of the card, I stamped the Crackerbox Stamps Happy Birthday Open sentiment and colored it with Copic Markers.

Interested in the products I used? For your convenience, products that are still available are linked to multiple shops below. Lists may contain affiliate links where possible at no additional cost to you. When you click on my links and make a purchase, I earn a small percentage of the sale. This helps me to keep creating and maintaining this website. Even though I design for several companies, I still purchase many supplies on my own. I do receive some free products to work with, and I sometimes make money for the projects I make. I DO NOT get paid for product reviews, I give my honest opinion about the products I use, and I will never recommend a product that I do not like or would not use. Affiliate and product disclosure and privacy policy can be found here.

July 27, 2023

Snarky Marriage Card

 Hello! Today I am sharing a snarky marriage card I made using stamps from Crackerbox Stamps' New Stamp Release.

Some of the products I have used in this post have been provided to me by various companies. The opinions I share are solely my own. Affiliate links may be used where possible at no cost to you. However, I will earn a small commission when you click on my link and purchase from them. Thank you, and I appreciate your support!

On the background, I randomly stamped the Crackerbox Stamps Card Suits Solid using VersaFine Clair Ink in Glamorous and Nocturne. Then around the outside edges, I ink blended some VersaFine Clair in Morning Mist. I then stamped the Crackerbox Stamps Cards Suit Hand and colored them with Copic Markers, and then fussy cut them out and adhered them to the stamped background with 3D Foam Squares.


For the sentiment, I stamped Crackerbox Stamps Marriage is Like in VersaFine Clair Nocturne and then embossed it using Mboss Embossing Powder in Black Hologram. I matted the sentiment and the card front with some red glitter paper.


Interested in the products I used? For your convenience, products that are still available are linked to multiple shops below. Lists may contain affiliate links where possible at no additional cost to you. When you click on my links and make a purchase, I earn a small percentage of the sale. This helps me to keep creating and maintaining this website. Even though I design for several companies, I still purchase many supplies on my own. I do receive some free products to work with, and I sometimes make money for the projects I make. I DO NOT get paid for product reviews, I give my honest opinion about the products I use, and I will never recommend a product that I do not like or would not use. Affiliate and product disclosure and privacy policy can be found here.

July 25, 2023

A Funny Shark Card

 Hello! With this week being shark week, I thought creating a shark card was a great time to do so.

Some of the products I have used in this post have been provided to me by various companies. The opinions I share are solely my own. Affiliate links may be used where possible at no cost to you. However, I will earn a small commission when you click on my link and purchase from them. Thank you, and I appreciate your support!

I first stamped Clyde the Shark, the Seaweed Tall, the Coral Sea Plant, the Fish School, and the What Doesn't Kill You sentiment, all from Crackerbox Stamps onto white cardstock for my front. I then masked the shark with masking paper, and using an airbrush and Copic Markers, I created the ocean floor and water in the background. Then I removed the masking from the shark and colored all the images with Copic Markers.

Interested in the products I used? For your convenience, products that are still available are linked to multiple shops below. Lists may contain affiliate links where possible at no additional cost to you. When you click on my links and make a purchase, I earn a small percentage of the sale. This helps me to keep creating and maintaining this website. Even though I design for several companies, I still purchase many supplies on my own. I do receive some free products to work with, and I sometimes make money for the projects I make. I DO NOT get paid for product reviews, I give my honest opinion about the products I use, and I will never recommend a product that I do not like or would not use. Affiliate and product disclosure and privacy policy can be found here.

July 20, 2023

Welcome Baby Duck Card

 Hello! Today I am sharing a super cute welcome baby card.

Some of the products I have used in this post have been provided to me by various companies. The opinions I share are solely my own. Affiliate links may be used where possible at no cost to you. However, I will earn a small commission when you click on my link and purchase from them. Thank you, and I appreciate your support!

I first started by creating the background for my card by spraying blue color sprays on some bubble wrap and then placing the card front down onto the bubble wrap.

Then I stamped the Crackerbox Stamps Large & Small Ducky and colored them in with Copic Markers, and fussy cut them out. Next, I stamped the Crackerbox Stamps Welcome Baby sentiment and cut it into a banner shape. Then adhered the ducks and the sentiment with some 3D foam squares. Matted the card front with yellow cardstock and adhered it to the card base.

Interested in the products I used? For your convenience, products that are still available are linked to multiple shops below. Lists may contain affiliate links where possible at no additional cost to you. When you click on my links and make a purchase, I earn a small percentage of the sale. This helps me to keep creating and maintaining this website. Even though I design for several companies, I still purchase many supplies on my own. I do receive some free products to work with, and I sometimes make money for the projects I make. I DO NOT get paid for product reviews, I give my honest opinion about the products I use, and I will never recommend a product that I do not like or would not use. Affiliate and product disclosure and privacy policy can be found here.

July 19, 2023

Cruise Ship Porthole Scrapbook Layout

Hello! Today I am sharing a cruise ship porthole frame scrapbook layout.

Some of the products I have used in this post have been provided to me by various companies. The opinions I share are solely my own. Affiliate links may be used where possible at no cost to you. However, I will earn a small commission when you click on my link and purchase from them. Thank you, and I appreciate your support!

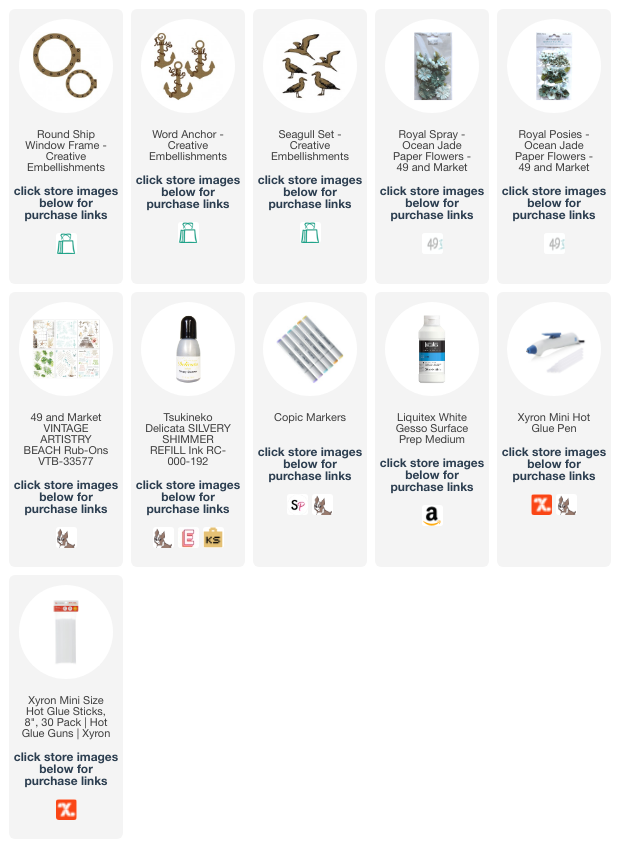
I painted the Creative Embellishments Round Ship Window Frames by dipping a paper towel in some white gesso and rubbing it onto the frame to give it a whitewashed look. Then I sprayed them with a gold color spray. On the smaller window, I cut my photo to fit the back of it, and for the bigger one, I cut a piece of patterned paper from 49 and Market Island Paradise Collection (retired) to fit that one.
On the Creative Embellishments Word Anchor, I painted it with Delicata Silvery Shimmer Ink Refill and used a brown Copic Marker to color the title and rope a darker brown. Around the porthole frames I also used some fishnet rub ons from 49 and Market.


For the Creative Embellishments Seagulls, I whitewashed them also with a paper towel and white gesso. Then for the beak and feet, I used an orange Copic Marker.


I added a flower cluster using flowers from 49 and Market. I adhered all of the chipboard pieces and flowers using my Xyron Mini Hot Glue Gun Pen.


Interested in the products I used? For your convenience, products that are still available are linked to multiple shops below. Lists may contain affiliate links where possible at no additional cost to you. When you click on my links and make a purchase, I earn a small percentage of the sale. This helps me to keep creating and maintaining this website. Even though I design for several companies, I still purchase many supplies on my own. I do receive some free products to work with, and I sometimes make money for the projects I make. I DO NOT get paid for product reviews, I give my honest opinion about the products I use, and I will never recommend a product that I do not like or would not use. Affiliate and product disclosure and privacy policy can be found here.

June 28, 2023

Sweet Birthday Card With A Pocket Gift Card Holder

 Hello! Today I am sharing a birthday card with a pocket to hold a gift card.

Some of the products I have used in this post have been provided to me by various companies. The opinions I share are solely my own. Affiliate links may be used where possible at no cost to you. However, I will earn a small commission when you click on my link and purchase from them. Thank you, and I appreciate your support!

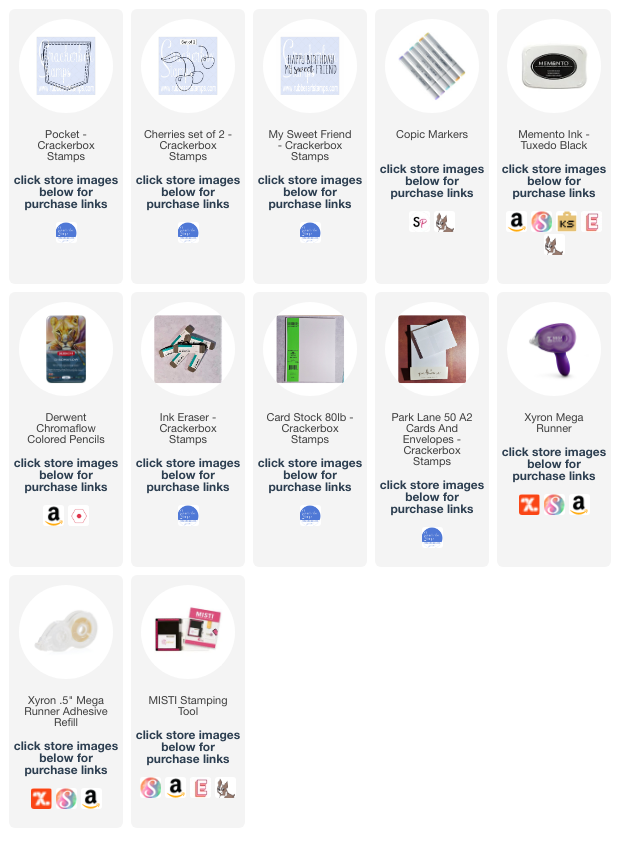
I first stamped the Crackerbox Stamps Pocket stamp and then stamped the Crackerbox Stamps Cherries on the pocket and colored them all with Copic Markers. On the stitching on the pocket, I used a gold pencil from the Derwent Chromaflow Colored Pencils Set. Once colored, I fussy cut out the pocket and applied a liquid adhesive to the bottom edge and side edges of the pocket, leaving the top open so I could slide a gift card into it. For the sentiment, I stamped Crackerbox Stamps My Sweet Friend along the top of the card front. Then matted the card front with red cardstock and adhered it to the card base.


Interested in the products I used? For your convenience, products that are still available are linked to multiple shops below. Lists may contain affiliate links where possible at no additional cost to you. When you click on my links and make a purchase, I earn a small percentage of the sale. This helps me to keep creating and maintaining this website. Even though I design for several companies, I still purchase many supplies on my own. I do receive some free products to work with, and I sometimes make money for the projects I make. I DO NOT get paid for product reviews, I give my honest opinion about the products I use, and I will never recommend a product that I do not like or would not use. Affiliate and product disclosure and privacy policy can be found here.

June 22, 2023

A Funny Frog Card With Stamp Layering

 Hello! Today I am sharing a funny frog card with stamp layering to create a scene.

Some of the products I have used in this post have been provided to me by various companies. The opinions I share are solely my own. Affiliate links may be used where possible at no cost to you. However, I will earn a small commission when you click on my link and purchase from them. Thank you, and I appreciate your support!

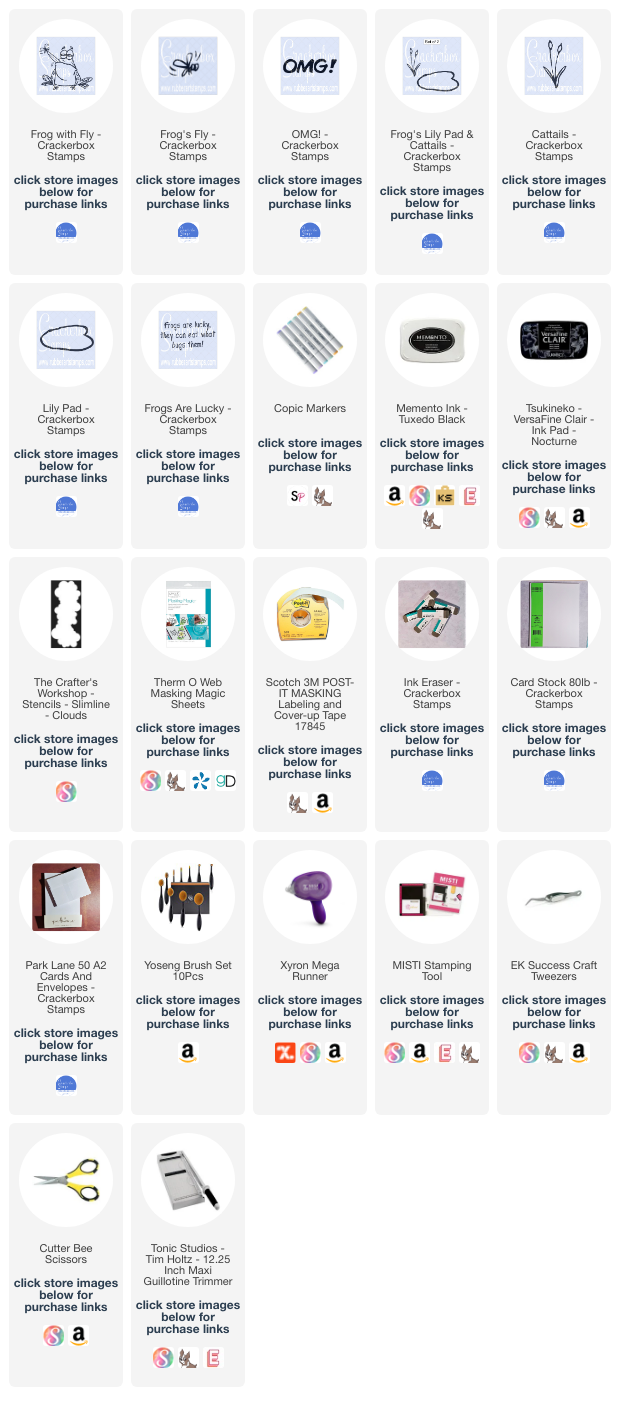
To create my card, I used several stamps from Crackerbox Stamps and layered them up using masking paper. First, I stamped the Crackerbox Stamps Frog with Fly on a white cardstock card front. I then stamped it again on some masking paper and fussy cut it out, and layered the masking paper over the frog. Next, I stamped the Crackerbox Stamps Lily Pad over the masked frog and then stamped the lily again on some masking paper, fussy cut it out, and masked off the lily too.  With the frog and lily still masked, I then stamped the Crackerbox Stamps Cattails on either side of the lily. Then masked the Cattails off. Then, I stamped the Crackerbox Stamps Frog's Fly with the Crackerbox Stamps OMG! and the Crackerbox Stamps Frogs Are Lucky sentiment. I also masked off the Frog's Fly. So all the stamp images were masked off except for the words. When layering stamps, you just need to remember that the image you want to be in the front is the image you stamp first and then mask off before stamping the next one.


Next, I used a strip of masking tape about at the same level as the frog's head, and below it, I ink blended some blue ink for water using blending brushes. 


I then removed the masking strip but still left all the stamp images masked. I used The Crafter's Workshop Cloud Stencil and some blue and grey inks to create a sky by blending ink with blending brushes. Then I lightly misted the ink blending with water, and placed a paper towel over it to soak up the water. This gave it a watercolor look. Once dry, I removed all the masking paper off all the images and colored them in with Copic Markers.


Interested in the products I used? For your convenience, products that are still available are linked to multiple shops below. Lists may contain affiliate links where possible at no additional cost to you. When you click on my links and make a purchase, I earn a small percentage of the sale. This helps me to keep creating and maintaining this website. Even though I design for several companies, I still purchase many supplies on my own. I do receive some free products to work with, and I sometimes make money for the projects I make. I DO NOT get paid for product reviews, I give my honest opinion about the products I use, and I will never recommend a product that I do not like or would not use. Affiliate and product disclosure and privacy policy can be found here.

June 10, 2023

Classic Car Masculine Birthday Card

 Hello! Today I am sharing a masculine birthday card featuring a classic woody car.

Some of the products I have used in this post have been provided to me by various companies. The opinions I share are solely my own. Affiliate links may be used where possible at no cost to you. However, I will earn a small commission when you click on my link and purchase from them. Thank you, and I appreciate your support!

This was a quick and easy card to make, with very little coloring needed. I first die cut out a circle in a brown piece of cardstock for my card front. Then I embossed it with a wood plank embossing folder. Laying the card front piece on my card base and lightly traced the cutout circle onto the white card base so I could see where the circle would be. Then I stamped the Crackerbox Stamps Woody and the Crackerbox Stamps You're A Classic sentiment in the center of the circle and colored them with Copic Markers. On the embossed card front, I lightly sanded the raised embossed areas so they were a lighter brown and then adhered it to my card base with foam tape.


CRACKERBOX STAMPS IS HAVING A HUGE STAMP SALE!


There are currently more than 100 specially selected stamps that are available at a 50% discount! Please note that there is a limited quantity available for each stamp at this incredible price. Once they sell out, they will return to their original price. Additionally, new stamps are being added as the current ones sell out, so it's a good idea to check back frequently.

Interested in the products I used? For your convenience, products that are still available are linked to multiple shops below. Lists may contain affiliate links where possible at no additional cost to you. When you click on my links and make a purchase, I earn a small percentage of the sale. This helps me to keep creating and maintaining this website. Even though I design for several companies, I still purchase many supplies on my own. I do receive some free products to work with, and I sometimes make money for the projects I make. I DO NOT get paid for product reviews, I give my honest opinion about the products I use, and I will never recommend a product that I do not like or would not use. Affiliate and product disclosure and privacy policy can be found here.